
Key Takeaways
- Feather shape, texture, flexibility, and shaft strength should match the project.
- Natural variation can add character, while dyed materials offer more color control.
- Inspecting, sorting, and testing feathers before use reduces waste.
- Responsible sourcing and proper storage protect both projects and materials.
- A small sample piece is often the best way to confirm color, movement, and attachment methods.
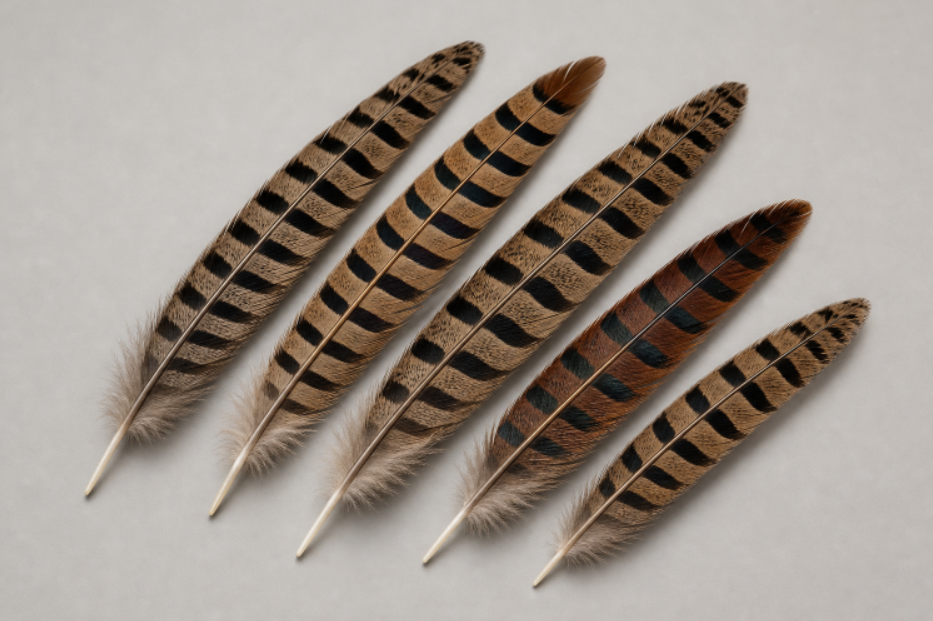
Feathers can bring movement, texture, softness, pattern, and structure to creative work, but the best choice depends on how the finished piece will be used. Whether selecting materials for a fly, costume trim, decorative display, or classroom craft, ringneck pheasant feathers can offer distinctive natural patterning and useful shapes for projects that need visual detail.
The key is to choose with purpose rather than buying by color alone. A long, firm feather may make a striking centerpiece, while a soft plume may be better for fullness and gentle movement. One feather type rarely performs equally well in every application.
Why Feather Choice Matters
The right feather can simplify an entire project. A naturally tapered piece may require little trimming for fly tying, while a broad feather can create immediate coverage on a costume accessory or seasonal arrangement. Starting with materials that already support the intended shape saves time and helps prevent breakage.
Feather selection also affects durability. Projects that will be handled, worn, transported, or displayed near windows need materials that can tolerate those conditions. Consider the amount of movement, light exposure, moisture, and contact the finished item will receive before committing to a large batch.
Start With Feather Anatomy
Basic anatomy makes material selection easier. The central stem is often called the shaft or rachis, the flat sections on either side are the vanes, and the smaller branches are barbs. Softer downy sections create volume, while firmer barbs help a feather hold a cleaner outline. A quick overview of feather anatomy can help crafters recognize why one piece feels rigid, and another appears airy or flexible.
For practical work, inspect the shaft first. A strong shaft is useful when wrapping, tying, stitching, or inserting a feather into foam or a base material. Fine shafts and soft barbs are often better for accents, layering, and movement than for structural support.
Match the Feather to the Project
Fly Tying
Look for consistent fibers, manageable shaft thickness, and a taper that suits the pattern. Feathers should be easy to secure without splitting, and the barbs should create the desired profile in water.
Costume Design
Prioritize comfort, flexibility, visual fullness, and attachment method. Lightweight feathers are usually easier to layer on fabric, headpieces, and accessories. Avoid sharp or overly stiff shafts where they may touch skin.
Home Décor and Nature Crafts
Choose pieces for proportion, color balance, and display conditions. Large feathers can anchor an arrangement, while smaller patterned pieces work well in framed studies, wreaths, place settings, and mixed-media art. For educational projects, select examples with visible shafts, vanes, and patterns.
Compare Natural and Dyed Materials
Natural feathers offer subtle shifts in color, barring, and sheen. These variations can make a design feel organic and layered. Dyed feathers are useful when a project requires a specific color palette, repeated visual elements, or bold contrast.
- Choose natural materials when pattern, earthy color, and one-of-a-kind variation matter.
- Choose dyed materials when uniformity or a strong theme is more important.
- Test darker dyes before combining them with pale fabrics or adhesives.
- Keep sunlight exposure in mind, especially for long-term displays.
Check Quality Before Starting
Inspect every bundle before beginning. Look for split shafts, crushed vanes, broken or missing barbs, stains, fading, dampness, mildew, or signs of insect damage. Minor irregularities are normal in natural materials, but damage near the shaft can make it difficult to attach a feather securely.
Sort usable pieces by length, width, color, and stiffness. This step prevents a common problem: using the best feathers too early, only to discover there are not enough matching pieces for the most visible part of the design.
Prepare Feathers With Care
Handle feathers gently. Remove loose dust with a soft brush or a careful burst of cool air, then place pieces in groups based on their intended role. Avoid aggressive pulling, soaking, or excessive heat, which can distort barbs, weaken shafts, or affect color.
If cleaning or shaping is necessary, test the method on a spare feather first. A small trial can reveal whether an adhesive, dye, cleaner, or storage condition changes the surface appearance.
Use Responsible and Legal Sources
Know where materials came from before collecting, purchasing, using, or selling them. In the United States, many native bird feathers are protected, and possession may be restricted even when a feather was found naturally. Review the U.S. Fish and Wildlife Service guidance on feathers and the law before using unidentified feathers.
Buy from suppliers that can explain sourcing, keep receipts or product records, and avoid assuming that a feather found outdoors is automatically legal to keep. When rules are unclear, choose commercially sourced materials with known origins.
Store Feathers So They Stay Usable
- Keep materials dry, cool, and out of direct sunlight.
- Store large feathers flat or upright in tall boxes so their vanes do not bend.
- Separate dark or dyed pieces from light-colored materials.
- Use clean containers and inspect stored supplies periodically for moisture or pests.
- Label bundles by type, color, size, and planned use.
Plan Before Buying
Sketch the project and identify the focal area before purchasing materials. Note the colors, approximate sizes, quantity, and attachment method. Then add a few backup feathers for trimming errors, breakage, and last-minute adjustments.
Ask whether the design needs flowing movement or firm structure, whether feathers will be glued, stitched, wrapped, or tied, and whether the finished item will be handled often. These answers guide better material choices than appearance alone.
Common Mistakes and Beginner Ideas
Common mistakes include overusing adhesive, mixing competing textures, skipping quality checks, and storing materials in damp areas. A balanced design often needs fewer feathers than expected. Use one strong focal area, then let smaller pieces support it.
Beginners can practice with a framed texture study, a feather-accented bookmark, a simple fly pattern, a seasonal table arrangement, or a classroom observation activity. Start small, test one attachment method, and build confidence before moving to larger projects.
Final Selection Checklist
- Is the feather responsibly and legally sourced?
- Does its size and shape suit the project?
- Does the texture create the intended movement or structure?
- Is the shaft strong enough for the chosen attachment method?
- Will the color work with the surrounding materials?
- Has a sample feather been tested first?
Conclusion
Successful feather work begins with careful selection. When shape, texture, color, strength, and sourcing align with the project, the result looks more intentional and wastes fewer materials. A thoughtful process also makes creative work easier to repeat, store, and enjoy.


